REVIEW · AMSTERDAM
Amsterdam Photography Masterclass – Private Photography Lesson
Book on Viator →Operated by Aperture Tours · Bookable on Viator
Big-city photos, taught step by step.
This private Amsterdam class is built around shooting the city’s most camera-friendly corners while you learn the basics from a professional photographer. I like how the pacing keeps you moving through real photo locations instead of sitting in a classroom, and I also like the small group setup that keeps attention on what you’re trying to capture.
You get practical lessons you can use immediately, from composition choices to camera settings, and the guide can tailor the focus if you tell them what you want to shoot. Names from past sessions include Renzo, who helped a student get their first real success with night photography, and William, who guided people toward better shots by working with the camera choices you have.
One possible drawback: you’ll need to bring your own DSLR camera, and the stops are intentionally short (about 20 minutes each), so it’s not the right fit if you want long museum time or slow wandering with zero structure. If you’re okay with a focused, hands-on walk, this is a strong way to level up fast.
In This Review
- Key points to know before you go
- The 3-Hour Photo Lesson That Feels Like a Walk (Not a Lecture)
- Meeting at Leidsekade 97: How to Start Smoothly
- Day vs. Evening: Pick Your Light, Pick Your Style
- Stop 1: Amsterdams Lieverdje Statue for Close-Up Storytelling
- Stop 2: Voetboogstraat and Beijbhof de Voetboogsteeg for Narrow-Street Composition
- Stop 3: Leidsegracht Bridges for Symmetry and Reflections
- Stop 4: Rijksmuseum and Grounds for Architectural Angles
- Stop 5: Magere Brug for Iconic Bridge Shots (Especially Near Dusk)
- Stop 6: Nieuwe Kerk for Facade Focus and Scale
- Stop 7: Blauwbrug for Color, Contrast, and Minimalism
- Stop 8: Nieuwmarkt for Street-Level Energy Without Chaos
- Stop 9: Huis Bartolotti for Details That Make Visitors Slow Down
- What You Actually Learn: Camera Basics You Can Use Tomorrow
- Your Gear Checklist (So You Don’t Trip at Stop 1)
- Price and Value: When $204.24 Makes Sense
- Who This Tour Fits Best
- Should You Book This Amsterdam Photography Masterclass?
- FAQ
- How long is the Amsterdam Photography Masterclass?
- Is this tour private?
- What language is the lesson in?
- What camera do I need to bring?
- Is a tripod included?
- Where does the tour start and end?
- Does it run in bad weather?
- Is the tour only during the day?
- Are there admission fees for the stops?
- What’s the cancellation policy?
Key points to know before you go
- Nine major Amsterdam photo stops in about three hours, including canals, bridges, and landmark architecture
- Private instruction with a professional photographer guide, capped at 4 people per booking
- Daytime or evening tours, so you can pick the light you want to work with
- Bring your own DSLR (camera gear is not included), with a tripod available only if you request it
- Short, repeatable practice blocks at each location so you leave with photos you can use
- Free admission for the listed stops, meaning your time focuses on shooting rather than ticket lines
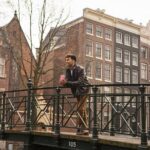
The 3-Hour Photo Lesson That Feels Like a Walk (Not a Lecture)
Amsterdam is basically a photography cheat code: canals that reflect light, bridges with clean lines, and buildings that frame the street like a camera viewfinder. This tour puts you outdoors for the full experience, so you’re learning by doing—pressing the shutter, checking results, and adjusting right away.
The biggest value for me is the combo of practical instruction plus hands-on time. You’re not just pointed at famous places. You’re given guidance while you stand there, in the same light you’ll be trying to photograph. And because it’s private and small, your guide can react to your camera and your goals instead of running the same script for everyone.
The schedule runs about three hours, and you’ll move through a sequence of nine stops. Each stop is around 20 minutes, which is ideal for learning without burning your energy. It’s also a reminder that you’ll want comfortable shoes and a camera strap you can trust—this is a walking lesson.
You can also read our reviews of more private tours in Amsterdam

Meeting at Leidsekade 97: How to Start Smoothly
The meeting point is Leidsekade 97, 1017 PN Amsterdam. The tour ends back at the same spot, so you don’t have to track the return part.
Because departure time depends on your selected date, check the correct start time in your schedule before you head over. This matters because Amsterdam’s best light can be time-sensitive, especially if you choose an evening session.
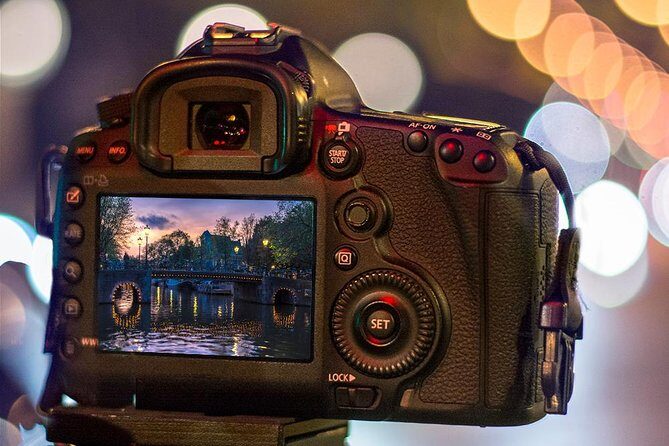
You also want your camera ready at the start. Since you’re bringing a DSLR (camera not provided), it helps to arrive with a charged battery, a memory card with space, and basic familiarity with your main mode settings. If you know how to switch between manual, aperture priority, or shutter priority, you’ll get more out of the instruction faster.
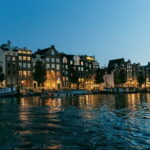
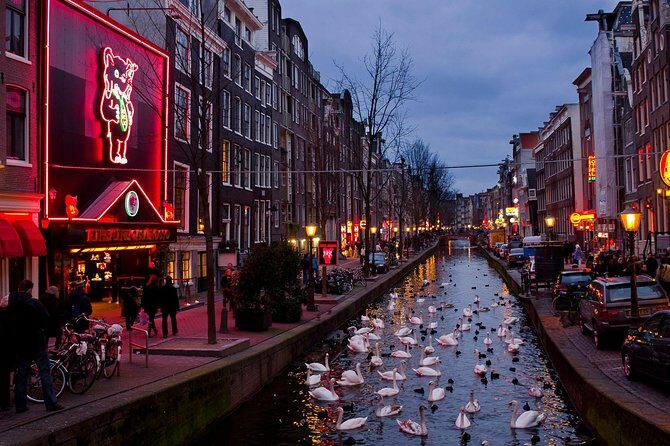
Day vs. Evening: Pick Your Light, Pick Your Style
You can choose between daytime and evening tours. That choice isn’t just a scheduling preference—it changes the way Amsterdam photographs.
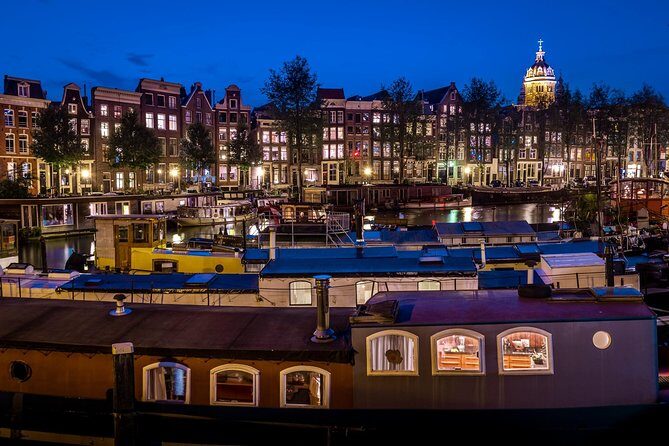
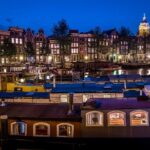
Day sessions tend to be great for crisp architectural details: straight-on building lines, bridge geometry, and the clean edges of churches and canal houses. Evening sessions add a different challenge and reward. You’ll be dealing with lower light, changing reflections on water, and darker streets where exposure and stability matter.
One review highlight worth taking seriously: Renzo worked with a student on night photos until the results looked right. If night photography has been frustrating for you, this kind of targeted help can save you from the usual guessing game.
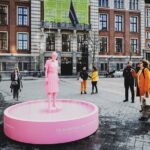
Stop 1: Amsterdams Lieverdje Statue for Close-Up Storytelling
Your first photo stop is the Amsterdams Lieverdje statue. What I like about starting here is that it’s a compact subject. It’s easier to focus on camera fundamentals like framing, depth of field, and choosing a background that doesn’t distract.
In a city full of big views, a close subject early in the lesson is useful. It lets you practice how to make a photo feel intentional before you move on to wider canal-and-bridge shots.
Possible consideration: if you’re hoping for only dramatic skylines, you might think a statue stop sounds small. But that small stop is usually the fastest way to learn the mechanics that will carry through the entire walk.
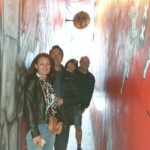
Stop 2: Voetboogstraat and Beijbhof de Voetboogsteeg for Narrow-Street Composition
Next up is Voetboogstraat and the Beijbhof de Voetboogsteeg area. Narrow streets are tricky in a good way. They force you to think about perspective: how the lines of buildings lead your eye, where to stand to keep walls and street elements from cluttering the frame.
This stop is also a lesson in control. When you’re close to subjects, small changes in angle can make a messy background turn into something clean and graphic. If you like street photography, this is where your camera starts to feel like a tool instead of a random snapshot device.
You can also read our reviews of more photography tours in Amsterdam
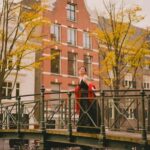

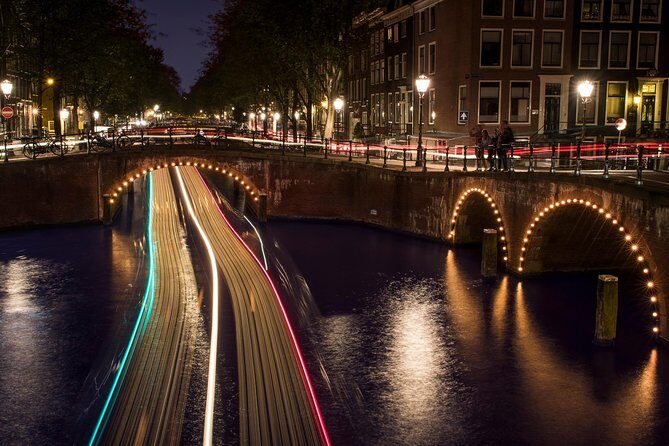
Stop 3: Leidsegracht Bridges for Symmetry and Reflections
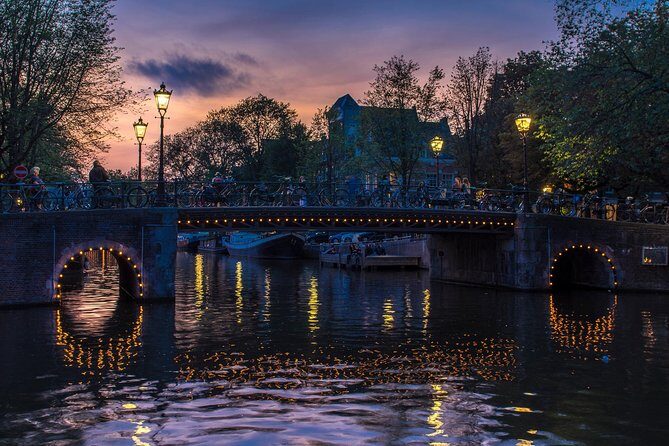
Leidsegracht is canal territory, and the bridge stops are where Amsterdam gets especially photogenic. Bridges offer structure—something you can align, center, and use as a compositional anchor.
The main thing you can practice here is reflection and exposure. Water reflections can look dramatic, but they also trick your camera. Light in the canal can be brighter or darker than the scene above it, so it helps to understand how your camera meters and how you can correct.
Practical tip for this part: look for a spot where the bridge lines and the canal water line up in your frame. Even a small move changes the reflection pattern a lot.
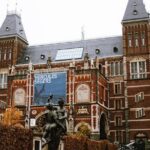
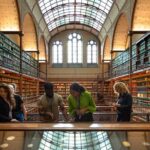
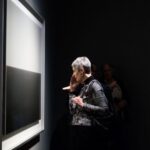
Stop 4: Rijksmuseum and Grounds for Architectural Angles

You’ll shoot the Rijksmuseum and the grounds. This is a smart middle stop because it balances wide views with architectural shapes that invite close attention.
What you can learn here is how to handle “big subject” photography without losing detail. When you photograph a large building, it’s easy for the frame to feel too wide or too messy. A guide-led lesson helps you decide what matters: full facade, doorway-level details, or a cropped view that emphasizes texture and lines.
Consideration: this stop is listed as free admission for the time you spend there, so don’t plan on spending lots of time inside a museum. Think of it more like a “make the exterior and grounds work for your photo style” moment.
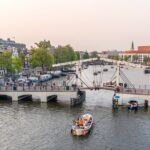
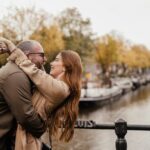
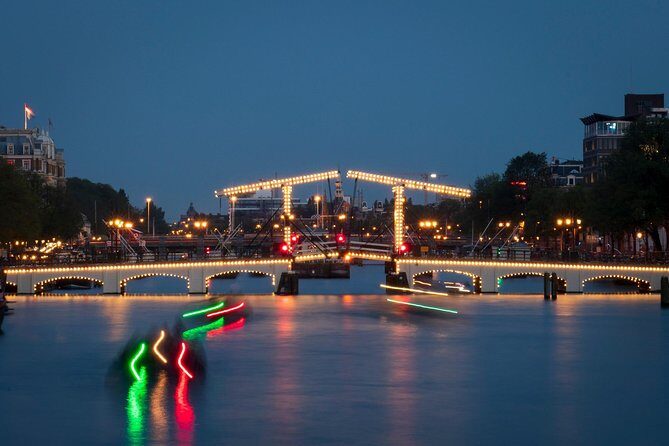
Stop 5: Magere Brug for Iconic Bridge Shots (Especially Near Dusk)
Next is Magere Brug, the kind of Amsterdam bridge that instantly reads as classic. This is a strong stop for practicing how to photograph something famous without making it look like a postcard.
You’ll likely work on angle and timing. Bridge photography can go two ways: a flat shot where everything sits at the same distance, or a shot with depth where the canal, bridge, and sky layers feel separated. A small shift in where you stand can make the bridge look more dimensional.
If you’re doing an evening tour, this is where the lighting challenge can become your advantage. City lights and darker skies can add atmosphere—if you understand exposure well enough to keep the image from going muddy.
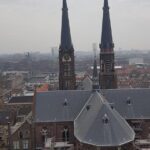
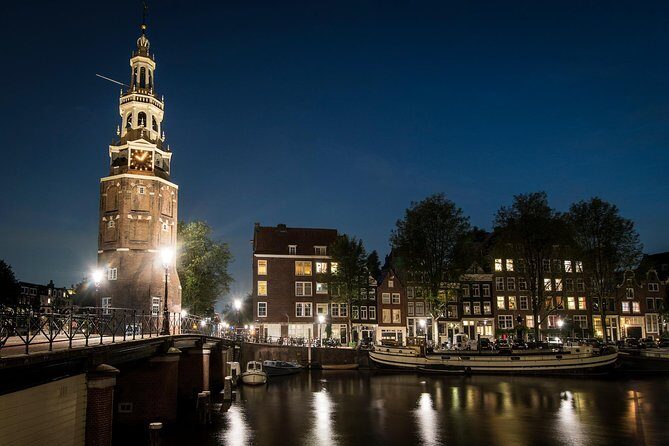
Stop 6: Nieuwe Kerk for Facade Focus and Scale
The Nieuwe Kerk stop gives you a different texture of subject: religious architecture with clear facade shapes and strong visual scale. Churches can be hard because they tempt you to aim straight up and end up with a distorted, cramped frame.
Instead, focus on choosing one main element—tower lines, doorway region, or a portion of the facade—and build your photo around that. This is a place to practice taking a step back first, then refining your composition.
Practical note: the tour operates in all weather. If it’s rainy, your camera settings and your lens handling matter even more. Wipe rain off your lens, and keep an eye on slipping on wet stone steps near entrances.
Stop 7: Blauwbrug for Color, Contrast, and Minimalism
Blauwbrug is a great contrast stop after the church facade. Bridges with distinctive color cues are useful because they reduce the guesswork about what the photo’s main subject is.
This is where minimalist composition can work really well. If you keep your background simple and emphasize the bridge color against canal water and street tones, your photos can look more graphic and less busy.
One thing I like about having this in the itinerary: you’re not only chasing famous landmarks. You’re learning how to photograph different “types” of Amsterdam scenes—architecture, streets, bridges, and canal reflections.
Stop 8: Nieuwmarkt for Street-Level Energy Without Chaos
Nieuwmarkt brings you into a square area. Squares can be chaotic in photographs because they contain motion, signage, and multiple sightlines.
The value of having instruction here is that you get help deciding what to include and what to ignore. A professional guide can steer you toward a version of the square that tells a story: the buildings as a backdrop, the canal-side geometry, or a view that frames everyday movement instead of capturing every random detail.
If your photo goal is people-and-place photography, this stop can help you build shots that don’t feel accidental.
Stop 9: Huis Bartolotti for Details That Make Visitors Slow Down
Your final stop is Huis Bartolotti, a building that’s especially rewarding for close attention. Canal houses often have design details that look great once you start seeing them as “photo elements”: windows, stone edges, and the overall shape that makes the facade recognizable.
This stop is a nice way to end because it rewards what you’ve practiced all along. By now you’ve had multiple short shoots, so you should be faster at checking your frame and adjusting quickly.
Also, finishing with details gives you practical souvenirs. A travel photo that’s too wide might not age well, but detail shots of texture and shape often stay interesting for years.
What You Actually Learn: Camera Basics You Can Use Tomorrow
The tour’s core promise is learning the basics of photography from a professional photographer guide. That can mean learning how to think about framing, shutter speed and aperture decisions, and how to choose a setup that matches the light you’re standing in.
The best part is that the “lesson” is built into the walk. You try a shot at a location, then you get guidance that helps you adjust for the next attempt. This is how you stop repeating the same mistake.
A theme from past experiences: guides can tailor the tour to the type of pictures you want to take. So if you’re leaning toward architecture, bridges, or night city shots, tell your guide early. You’ll get more value when your guide knows your intent.
If you want to work on night photos, this is also one of the better formats for it. Low light can be frustrating, but having on-location help reduces the trial-and-error suffering. You’ll also learn what you need to do to stabilize shots when the light drops.
Your Gear Checklist (So You Don’t Trip at Stop 1)
Here’s what matters for this lesson based on what the experience provides and asks for:
- Bring your own DSLR camera
- A tripod is not included, but you can request one
- Wear shoes that handle canalside walking and possible wet pavement
- Dress for the weather since it runs in all conditions
If you’re missing any basics—like an extra battery or a lens cloth—you’ll feel it during long photo sessions. Before you leave your hotel, it’s worth checking your battery charge and cleaning your lens once.
Also, think about how you’ll carry the camera comfortably. You’ll be moving between stops, and you want easy access without fumbling. A camera you can grab quickly helps you catch the best angle before the scene changes.
Price and Value: When $204.24 Makes Sense
The price is $204.24 per person for a private photography lesson lasting about three hours. That’s not “cheap,” but it’s not in the luxury zone either—especially because you’re paying for a professional photographer guide and private time.
The value comes from three things:
- Private, small-group attention (max 4 people)
- Time on location at multiple iconic spots
- Action-based learning, not just watching someone else shoot
If you’re traveling with another person, this becomes even more logical because the group cap helps keep the experience personal. And with typical bookings happening about a month in advance, it’s clear this is a popular way to get focused photography help in a short stay.
If you already know your camera deeply and only want sightseeing photos, you might find a regular walking tour or self-guided route cheaper. But if you want results and faster learning, this format is built for you.
Who This Tour Fits Best
This is a great fit if you:
- Want a structured way to photograph Amsterdam without guessing
- Like canal and bridge scenes and want better framing
- Feel stuck with camera settings and want hands-on help
- Prefer a small-group, private teaching experience
It’s also a nice match for beginners who are comfortable bringing a DSLR and learning through practice. The guide can take your current level and help you improve with clear instructions.
If you don’t want to walk, dislike short photo practice blocks, or are only interested in museum interior time, you might feel boxed in. This lesson is outdoors and shot-focused, with many locations in a tight timeline.
Should You Book This Amsterdam Photography Masterclass?
I’d book it if you want photos that look intentional, not just recorded. The itinerary is packed with visual variety—statue close-ups, narrow alleys, canal bridges, landmark exteriors, and detailed canal-house architecture. More importantly, the instruction is tied to where you’re standing, which is how you actually improve.
I’d think twice if you need long museum time, hate walking, or aren’t ready to use your own DSLR. Also, if you’re expecting a “one perfect spot” experience, the multiple short stops might feel too fast.
If you can handle a focused 3-hour photo walk, this is one of the better ways to get better pictures in Amsterdam without losing a day to trial and error.
FAQ
How long is the Amsterdam Photography Masterclass?
It’s approximately 3 hours.
Is this tour private?
Yes. This is a private tour/activity, and only your group will participate. The maximum is 4 people per booking.
What language is the lesson in?
The experience is offered in English.
What camera do I need to bring?
You should bring your own DSLR camera. Camera equipment is not included.
Is a tripod included?
A tripod is not included, but it may be available upon request.
Where does the tour start and end?
It starts at Leidsekade 97, 1017 PN Amsterdam, Netherlands and ends back at the same meeting point.
Does it run in bad weather?
Yes. It operates in all weather conditions, so dress appropriately.
Is the tour only during the day?
No. You can choose between daytime and evening tours.
Are there admission fees for the stops?
The stops listed in the schedule show admission ticket free, meaning you won’t need paid entry tickets for those scheduled shooting moments.
What’s the cancellation policy?
Free cancellation is available up to 24 hours in advance for a full refund. If you cancel less than 24 hours before the start time, the amount you paid won’t be refunded.